

Knead to know … our guide to making bread dough
Making your own bread at home is a rewarding, cost-effective and delicious thing to do. There’s nothing quite like the smell of freshly baked bread wafting through your home. For something that tastes so good, bread has surprisingly simple ingredients – all you need are flour, yeast, water and salt to create a loaf. Baking your own bread is not difficult but there are some really important steps that will ensure a perfect loaf every time.
1. Measuring
At the most basic level, making bread is about science. Most of the magic of making a good bread is due to chemical reactions between ingredients and so it is vital to ensure that you are accurate when weighing and measuring ingredients.
2. Mixing
Follow the recipe instructions adding ingredients in the order specified and then mix to combine.
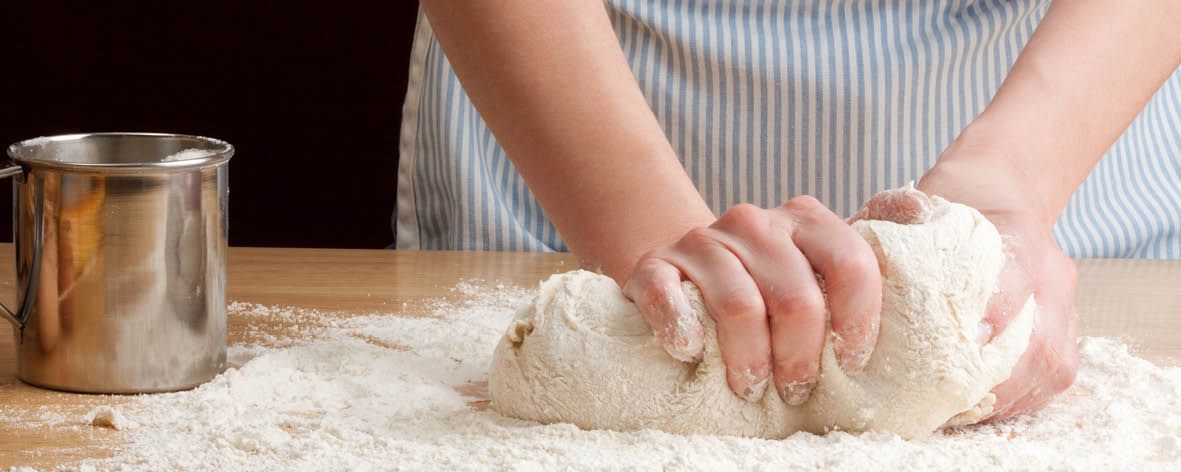
3. Kneading
Once the ingredients have been combined you can begin the important process of kneading the dough. Wheat flour contains two proteins—gliadin and glutenin—which combine to form gluten. When you mix flour and water together these proteins blend to form a gluten network and it is this that gives bread its strength and elasticity. When the dough is first mixed, the proteins are not arranged in any order, and the process of kneading the dough helps to develop the gluten, and to create an orderly gluten network that gives bread structure and texture.
Kneading dough involves folding and stretching the dough repeatedly. Do this by forming the dough into a ball, then using your hands to flatten the ball slightly. Take the part of the dough that is closest to you and fold it over the top of the dough. Then use the heal of your hand to push the dough down and away from you. Turn the dough and repeat. Continue kneading for the time specified in the recipe or until you achieve the consistency stipulated.
As a general rule, most bread recipes will tell you to knead the dough until it is smooth and elastic. Of course, you should always follow the instructions in the recipe you are using, but if you want to check if the dough has been kneaded enough, you can do the “Windowpane Test”. Tear off a small amount (approximately one tablespoon) of dough. Flatten it out and then stretch it gently using your fingers. Continue stretching the dough, rotating it so that you are stretching from all sides. If you can stretch the dough until it forms a thin, translucent membrane (the windowpane) then it is ready. A well kneaded and developed dough will stretch very thin before it breaks.
4. Proofing
After kneading comes proofing, a process whereby the dough ferments and rises. Proofing dough is simple, in fact you don’t have to do anything but let the dough rest and the yeast will do all the work. During proofing, the yeast produces carbon dioxide, and it is this that makes bread dough rise and expand. The carbon dioxide bubbles generated during proofing are held by the gluten network that was created during kneading.
Learning how to tell when the dough has risen enough is important for ensuring that your bread is perfect. Under-proofed dough does not develop enough carbon dioxide leading to a tight crumb. Over-proofed dough is dough that has been left for too long resulting in the gas bubbles popping. Over-proofed dough will not rise properly when baked. Often, proofing is considered complete when the dough has doubled in size, however always follow the instructions in the recipe you are using to know how long to proof your dough.
When proofing dough keep it in a warm, draft-free spot and place a damp tea-towel over the bowl to prevent the dough from drying out.
5. Punching Down
When the dough has finished the proofing process it is time to punch it down. This technique releases the gas that has built up, redistributes the yeast and deflates the dough. This is how you prepare it for shaping into loaves or other shapes. Most recipes require two rounds of proofing with the dough punched down after the first proof. To punch down the dough simply make a fist and push firmly into the dough. Once it has deflated you can then knead it lightly before shaping into rolls, baguettes or loaves.
6. The second proof
Once shaped, the dough needs to proof again. Again, follow the recipe directions however, usually you will want the dough to double in size again.
7. Baking
The final step is baking. Avoid opening the oven during baking because the cool air that enters will disrupt the baking process. Instead, sit back and relax and wait for that unmistakable smell of hot bread to envelop you.